


You’ve downloaded the app, you have the reader and you’re ready to start swiping cards. Here’s how to process a new sale using Phone Swipe:
1. Tap New Charge: The Charge Summary screen will appear.
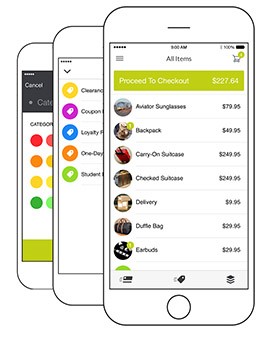
2. Enter charge amount: Enter the total amount of the charge or select item from your inventory (see How to Process a New Sale with
3. Itemization). Note: The decimal is automatically entered: 4 5 5 0 will display as $45.50. Tap NEXT to continue.
Charge Review: The Charge Review screen will appear. If a tax rate has been entered, the tax will be automatically entered. If the charge appears correct, tap CHARGE. If you need to correct the Amount, tap BACK.
If Tipping is Active (Otherwise skip to Step 6):
1. Hand device to customer: A message will display instructing you to hand the device to the customer. Tap OK and hand the device to the customer.
2. Customer selects tip amount: The customer can select a Tip Amount from any of the 4 default percentages (10%, 15%, 18%, 25%) or enter a Custom Amount by tapping CUSTOM. Once selected, the customer taps OK. A message instructing the customer to return the Device will appear. Tap OK when you receive the device back from the customer.
If Using Card Reader Accessory (Otherwise skip to step 7):
1. Swipe card with hardware card reader – Swipe the card as shown on the card reader accessory. After the card is read, the screen will display PROCESSING. Skip to Step 9. If the card is unreadable, you can enter the card information manually – continue to Step 7.
If Not Using Card Reader Accessory:
1. Manually enter card information: If the card reader accessory is not present, or the card cannot be read, tap ENTER CARD MANUALLY.
2. Enter card information: Enter each of the required Card Data Fields:
Card Number: Enter exact card number.
- Expiration: Enter the two-digit month and two-digit year of the card expiration, e.g., 08/11. The / dividing the -month from the -year will automatically be entered
- CVV/CVC: Enter the 3-digit CVV or CVC security number located on the back of the card for Visa, MC, and Discover or the 4-digit security number located on the front of the card for American Express.
- Zip Code: Enter the billing address’ zip or postal code for the card (requested from customer).
- Billing Street Address: Enter up to the first 5 numerical digits from the billing street address for the card. Do not include spaces.
Example:
16756 Hampton Avenue > Enter 16756
4001 Bowser > Enter 4001
12 Main Street > 12
3. Invoice Number (optional): Enter your invoice number if desired.
4. Tap CHARGE: To complete the charge request, tap CHARGE. The screen will display PROCESSING while it contacts the processing service.
5. Response: A response will be displayed indicating the status of the charge. Please refer to the guide for further information on declines, referrals or pick up responses.
6. When approved, hand device to customer for signature: A message will display instructing you to hand the device to the customer for their signature. TAP OK and hand the device to the customer. If you choose not to require a signature for amounts under $25, this screen will not appear for transactions under $25.Customer Signature: The customer signs their name in the space provided using their index finger. Tap OK once the signature is complete. A message will display instructing the customer to return the device to you.
If Receipt is On (Otherwise skip to Step 14):
1. Receipt Options: If the Receipt Option is on, a Receipt Screen will display with the option of gathering the customer’s name and e-mail address. Ask the customer if they would like to have a receipt e-mailed to them. If YES, enter their information by tapping on the text for each. Ask the customer if he or she would like to have his or her name added to your e-mail mailing list. Inform the customer what your email address is and tell them to add your email address to their address book to ensure your email doesn’t get sent accidentally to their spam folder. If NO, slide the switch from OFF to ON. Tap E-MAIL RECEIPT to send the receipt, or NO THANKS to continue without sending a receipt.
2. End of Transaction: A message will display indicating the transaction is complete. Tap OK to return to the Start Screen.
Happy swiping!
Share it.


